What is the installation process for this prismatic reflective film? Are any special tools required?
The prismatic reflective film, a key component in safety and design, enhances visibility and aesthetics across various applications. Its installation, critical for optimal performance, requires precision and care. This article delves into the detailed installation process of prismatic reflective film, exploring the necessity for specific tools and techniques.
1. Surface Preparation
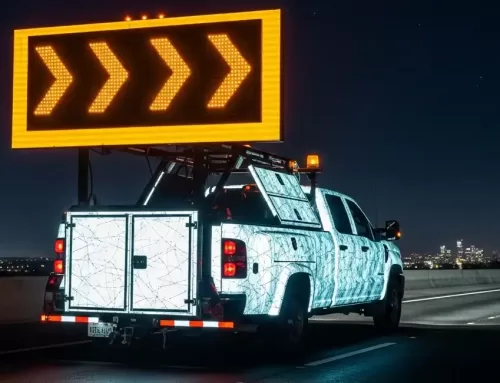
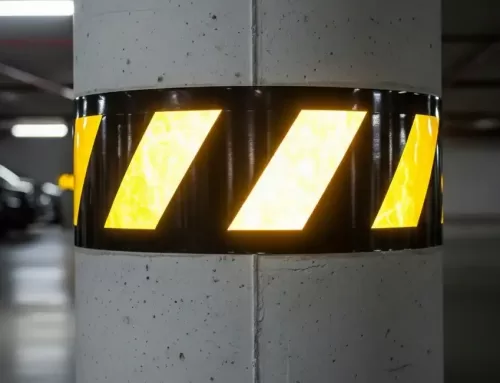
The first step in installing prismatic reflective film is preparing the surface. A clean, dry, and smooth surface ensures strong adhesion and longevity. Historical data suggests that most installation failures result from inadequate surface preparation. Cleaning the surface with a solvent or detergent removes dirt, grease, and residue, creating an ideal base for the film. For reflective sheeting applications, this step is crucial in traffic signs and vehicle wraps where durability is paramount.
2. Measuring and Cutting
Accurate measurement and cutting are essential for a seamless installation. Using tools like rulers or measuring tapes ensures accuracy, and a clean cut contributes to the aesthetics and effectiveness of the film. Historically, precision in this step has been linked to the professional appearance and performance of the reflective sheeting in traffic and safety applications.
Incorrect measurements and cuts not only waste material but also result in a poor fit, affecting the overall look and effectiveness. In the context of reflective signage, imprecise cuts can lead to reduced legibility and effectiveness, especially at night. Tools like precision cutters and clear rulers are indispensable in this step.
3. Application Solution
A soapy water solution, applied to the surface, facilitates the film’s application. This technique, originating from traditional vinyl film applications, aids in positioning the film and eliminates air bubbles, a critical factor in ensuring uniform reflectivity and durability.
It allows for repositioning of the film, a critical aspect especially for large-scale applications like vehicle wraps or sizable signage. Without this flexibility, the film may end up misaligned or with unwanted creases, severely impacting its reflective capabilities and aesthetic appeal.
4. Applying the Film
The application process requires careful handling to prevent creases and air bubbles. Starting from one edge and gradually proceeding ensures a smooth application. This technique has evolved from early vinyl applications to accommodate the unique properties of prismatic reflective films.
Applying the film requires a steady hand and patience. Rushing this step can lead to air bubbles and wrinkles. In traffic signs, these imperfections can lead to “hot spots” or areas of reduced reflectivity, which can be a safety concern. The technique of applying from one edge and gradually proceeding helps mitigate these issues.
5. Squeegee Out Bubbles
sing a squeegee or similar tool to smooth out the film is a critical step. This process, derived from traditional decal applications, is vital for removing air bubbles, which can affect the film’s reflective properties and longevity.
Air bubbles trapped under the film can lead to premature aging and peeling. In safety applications, such as on emergency vehicles, this can mean the difference between high and compromised visibility.
6. Trimming
Trimming excess material with a precision knife or cutter ensures a perfect fit. This step, requiring skill and precision, has been a part of film applications since their inception, crucial for both aesthetics and functional integrity.
Trimming is not just a cosmetic step; it’s crucial for the film’s integrity. Overlapping or jagged edges can lead to areas where water and dirt accumulate, eventually leading to the film lifting off the surface. Precision in this step ensures a clean, professional finish that lasts.
7. Drying Time
Allowing the film to dry completely is essential. Historical practices show that adequate drying time is key to the film’s performance, particularly in outdoor applications where environmental factors are a concern.
The drying process solidifies the film’s adhesion to the surface. Rushing this step or not allowing the film to dry properly can lead to weak adhesion, leading to peeling, especially in outdoor environments. This is particularly critical in reflective sheeting used in outdoor signage.
8. Tool Requirements
The importance of using the right tools cannot be overstated. Each tool, from the squeegee to the precision cutter, plays a vital role. For instance, a substandard squeegee might not remove all air bubbles, compromising the film’s appearance and functionality. Similarly, a blunt cutter can tear the film, leading to a poor finish.
The installation of prismatic reflective film typically requires basic tools: a squeegee for smoothing, a precision cutter for trimming, and a cleaning solution. In some cases, a heat gun may be necessary, especially for curved surfaces. These tools, rooted in traditional film application practices, are essential for achieving professional results.
Conclusion
The installation of prismatic reflective film is a meticulous process that demands attention to detail. From surface preparation to drying, each step plays a crucial role in the film’s performance and longevity. While the required tools are relatively basic, their proper use is essential for a successful application. As this technology continues to evolve, these installation practices and tools will adapt, ensuring that prismatic reflective films remain a vital component in safety and design.